Insight of Occlum Instance Generation
For every application to be running in Occlum (TEE env), all the running required files, libraries and binaries have to be put into Occlum file system. Here is the tree view of one Occlum instance.
./occlum_instance/
|-- Occlum.json
|-- build
|-- image       // Occlum root file system
|   |-- bin
|   |-- dev
|   |-- etc
|   |-- host
|   |-- lib
|   |-- lib64
|   |-- opt
|   |-- proc
|   |-- root
|   |-- sfs
|   |-- sys
|   `-- tmp
|-- initfs      // Occlum init file system
|   |-- bin
|   |-- dev
|   |-- etc
|   |-- lib
|   `-- proc
`-- run
File System from Occlum Perspective
Let’s clarify some definitions users usually get confused.
host file system
Host means the environment where users run Occlum build. Usually it is the Occlum official docker image. In this environment, users build and prepare all files to be running in Occlum.
Occlum init file system
Occlum has a unique Occlum -> init ->application boot flow, please check boot_flow for detail. So the Occlum init file system is what the Occlum init process sees. In develop stage, it is in the path occlum_instance/initfs. Generally, a occlum new generates a default init file system, users don’t need modify this part unless you know exactly what you are doing.
Occlum root file system
It is the file system the real application sees. And it is also the place users need put all the running required files, libraries and binaries. In develop stage, it is in the path occlum_instance/image.
In summary, to generate Occlum instance, one important step is to copy application running required files from host file system to Occlum root file system.
Next, it is an example of using copy_bom to ease the Occlum root file system creation.
Redis in Occlum
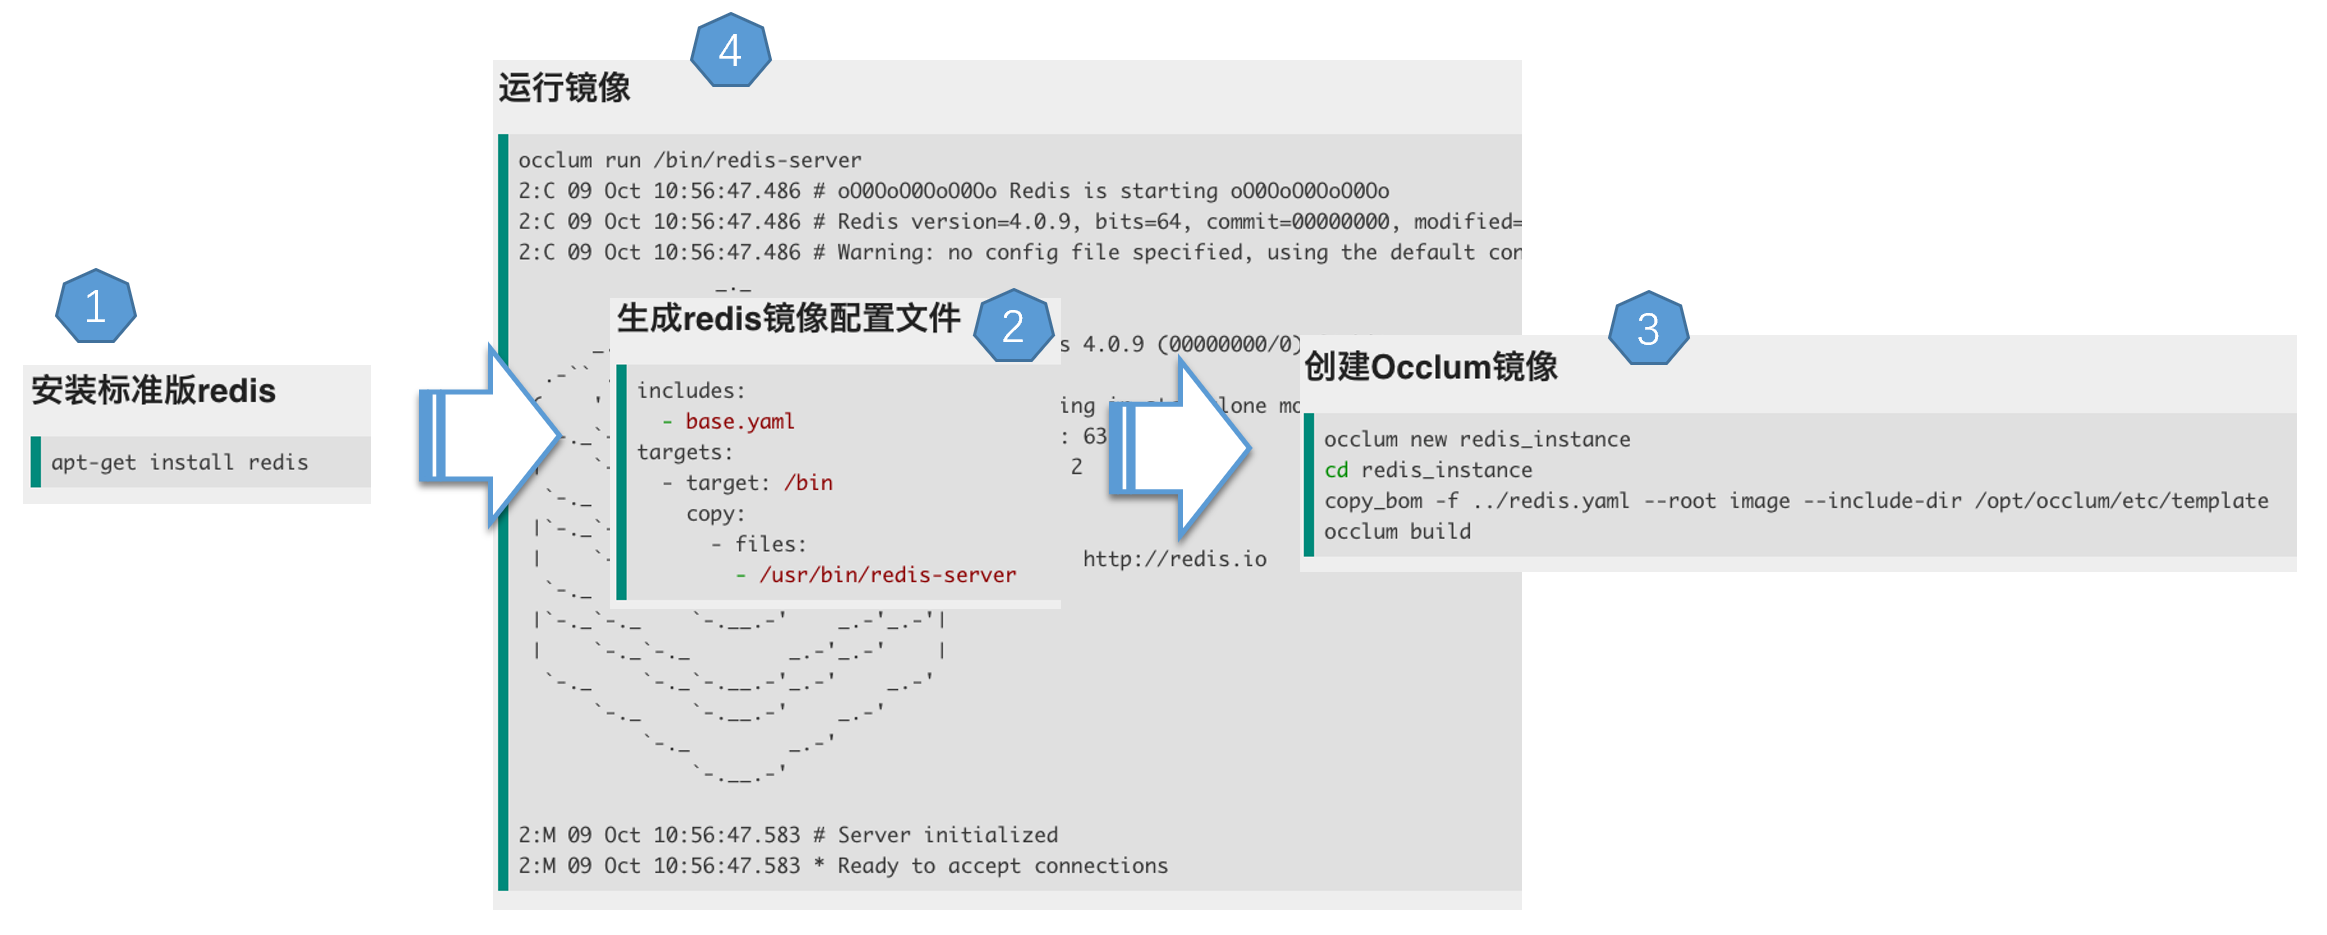
There is a redis demo in github which is built from source. Actually, users could use the OS installed redis binary directly to generate a runnable Occlum Redis instance by following steps.
Install the redis by apt.
apt install redis-server
Create a redis.yaml to assist generate redis Occlum instance.
includes:
  - base.yaml
targets:
  - target: /bin
    copy:
      - files:
        - /usr/bin/redis-server
Generate and build redis Occlum instance
occlum new redis_instance
cd redis_instance
copy_bom -f ../redis.yaml --root image --include-dir /opt/occlum/etc/template
occlum build
Run the redis server in Occlum
occlum run /bin/redis-server
The whole flow is like below.
 redis
redis
Very easy and straightforward, right?
Next let’s explore the magic of copy_bom.
copy_bom Case Study
The copy_bom tool is designed to copy files described in a bom file to a given dest root directory. For details users could refer to page.
The most important and useful function of copy_bom is the automatic dependencies finding and copy. For the redis case, there are so many dependent libraries the redis-server required for running.
 LDD for redis-server
All the dependent libraries above have to be copied to occlum_instance. But the redis.yaml showed above just has redis-server. How come it is running well in Occlum?
That is because the copy_bom would detect binaries or libraries defined in the yaml file, find all the dependencies and copy them to the corresponding path in occlum_instance/image. For this case, all required libraries would be in place after copy_bom operation.
 Occlum redis tree